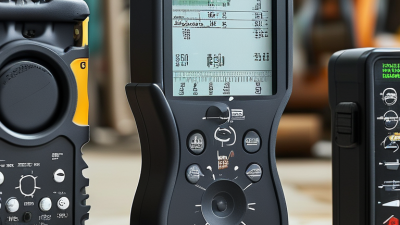
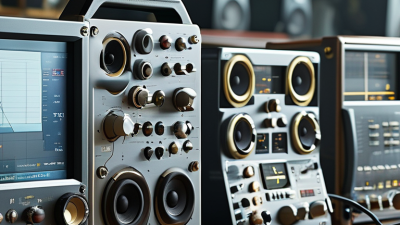
Picking out the right Sound Calibrator really starts with understanding how, where, and why you're gonna use it. For example, a field tech might need something compact for daily check-ups, while a lab might require a device with higher accuracy, documented traceability, and consistent performance across tests. Honestly, these needs can be pretty different.
A dependable Sound Calibrator should match things like microphone size, sound level, frequency, and measurement class based on what you actually need. Usually, reference points like 94 dB or 114 dB at 1 kHz are common, but keep in mind—they're not one-size-fits-all. Make sure to check your sound level meter’s specs before you buy. Little details really matter—say, a loose adapter could mess up the microphone seal, or a low battery might throw off measurements, especially in the field.
When you're choosing, it’s smart to think about compliance with standards like IEC 60942, along with calibration certificates, environmental limits, and how easy it’ll be to get support or service down the line. Certificates from labs under ISO/IEC 17025 tend to give you more confidence in measurement traceability, but honestly, certification isn’t everything. Does it feel straightforward to operate? Is the display clear? Can it handle the kind of conditions you'll be working under? Those things count too.
No perfect choice exists, though. A super-accurate model might be a bit heavier, pricier, or slower to get into action. On the flip side, a basic model might be more convenient but could fall short for more rigorous calibration tasks. It's a good idea to review your typical measurement routines so you can see what trade-offs you’re comfortable with before pulling the trigger. Take the time to compare accuracy, compatibility, durability, maintenance needs, and overall costs over the long haul. In the end, the best Sound Calibrator isn't necessarily the most advanced or expensive—it's the one that helps you get reliable results in real-world conditions, no fuss, no surprises.
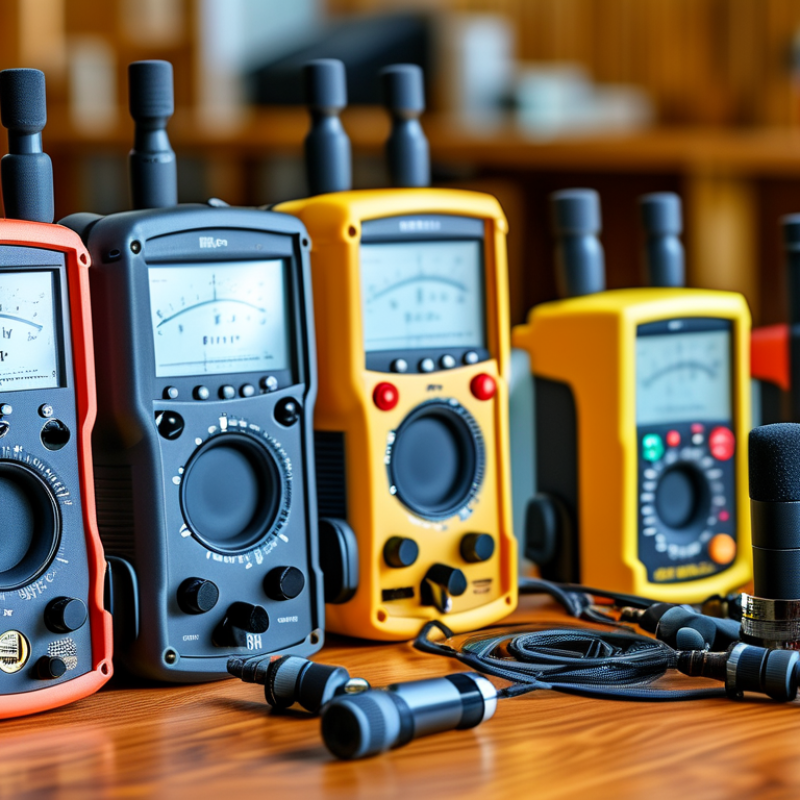
Begin by defining what you need to verify. A field technician may check a sound level meter before daily measurements. A laboratory may require tighter control, documented stability, and traceable results. These purposes demand different calibrator capabilities. Keep it practical.
Identify the microphone size, target sound pressure level, and calibration frequency. The calibrator must match the measurement instrument and microphone adapter. A poor fit can create leakage and unreliable readings. Check the operating range carefully. A calibrator that reaches only one test level may limit future work.
I once focused too heavily on accuracy specifications and overlooked field conditions. The unit was precise, but difficult to use with cold hands and protective equipment. Battery access also mattered more than expected. Consider temperature, humidity, transport, and available power. Look for clear controls, stable output, and a readable display. Short verification steps reduce handling errors. That matters.
For professional work, review calibration certificates, stated uncertainty, and measurement procedures. Traceability supports confidence, but it does not replace proper technique. Record the instrument, date, environment, and observed level during each check. Repeated results should remain consistent within your defined tolerance. No choice is perfect. Your requirements may change, so allow reasonable flexibility without paying for features you will never use.
How to Choose the Right Sound Calibrator?
Understand Sound Calibrator Classes and Performance Standards
Choosing a Sound Meter Calibrator starts with its performance class, not its appearance. IEC 60942 commonly defines Class LS, Class 1, and Class 2 calibrators. Class LS offers the tightest performance for laboratory reference work. Class 1 suits precision field measurements and professional acoustic surveys. Class 2 is suitable for many general monitoring tasks. However, local regulations may require a specific class.
Check the calibrator’s frequency and sound pressure level. A 1 kHz tone at 94 dB is widely used for routine checks. Some instruments also support 114 dB, which helps when background noise is high. The coupler must fit the microphone securely. Even a small gap can cause leakage and produce a misleading reading. It should feel stable, not forced.
Look for a current calibration certificate with traceability to recognized national or international standards. ISO/IEC 17025 laboratory records provide stronger evidence than an undocumented factory check. Before and after each measurement session, compare the meter’s reading with the calibrator output. Record temperature, humidity, date, and observed deviation. These details reveal gradual drift. A practical lesson is easy to miss: the highest class is not always necessary. It can add cost without improving results. Yet choosing a lower class only because it is cheaper may weaken your measurement evidence. Recheck the manufacturer’s specifications and your local compliance requirements.
Understand sound calibrator classes and performance standards before selecting a device for field measurements, laboratory verification, or precision testing.
| IEC 60942 Class | Typical Application | Selection Guidance |
|---|---|---|
|
LS Laboratory Standard |
Reference laboratories and calibration facilities | Choose when the highest available measurement performance and traceability are required. |
|
Class 1 Precision |
Precision sound level meters and professional field measurements | Use for demanding environmental, industrial, and acoustic measurement work. |
|
Class 2 General Purpose |
Routine field checks and general-purpose sound measurements | Choose when the measurement system and applicable regulation permit Class 2 performance. |
The chart shows two widely used reference output levels. At 1 kHz, 94 dB SPL corresponds to 1 Pa RMS and 114 dB SPL corresponds to 10 Pa RMS. The required calibrator class should match the sound level meter, microphone, applicable regulation, and the performance requirements of IEC 60942.
Choosing a sound calibrator starts with the sound level meter’s accuracy class. A high-precision meter needs a calibrator with equal or better performance. Otherwise, the calibration may create false confidence.
Check the meter’s specifications before purchasing. A Class 1 meter commonly requires a more accurate calibrator than a Class 2 meter. The calibrator should also comply with the relevant sound calibration standard, such as IEC 60942. Its stated uncertainty must remain comfortably below the measurement tolerance. “Close enough” is not a reliable strategy.
Frequency matters too. Many calibrators provide a reference tone at 1 kHz, often at 94 or 114 dB. Confirm that your meter supports the selected level without overload. The microphone diameter and coupler must fit tightly. A loose connection can produce an unexpectedly large error.
Small details matter.
Check the battery, temperature limits, and calibration certificate before recording results. Calibrate both before and after important measurements when possible. If the readings differ, investigate instead of averaging them away. That shortcut may hide a damaged microphone, poor sealing, or changing conditions.
I used to focus mainly on the displayed accuracy figure. That was too narrow. Traceability, repeatability, and practical handling deserve equal attention. A technically excellent calibrator is still a poor choice if workers cannot use it consistently.
How to Choose the Right Sound Calibrator?
Selecting a Sound Level Calibrator starts with the correct frequency. A 1 kHz tone is widely used for routine acoustic checks. However, your instrument may require another frequency. Always inspect its manual and measurement procedure before testing. A mismatch can create a clean-looking result that is still unsuitable.
The output level also matters. A 94 dB setting is common for laboratory and field verification. A 114 dB setting may help when background noise makes the lower level difficult to confirm. Check the microphone’s permitted input range first. During field work, I record the selected level, frequency, and measurement time. Small details often explain later differences. I sometimes rush this step, which is a useful reminder to slow down.
Choose a coupler that matches the microphone diameter and shape. A loose connection can leak sound around the microphone, while excessive pressure may affect the fit. Common setups use half-inch microphones, but smaller microphones may need a suitable adapter. The microphone should sit evenly, without visible gaps. Before calibration, check the coupler for dust, cracks, or hardened seals. I also repeat the check after moving between rooms, because temperature and handling can change the result. Accuracy is not guaranteed by the calibrator alone.
| Selection Factor | Common Options | Recommended Choice | Why It Matters | Selection Check |
|---|---|---|---|---|
| Calibration Frequency | 250 Hz, 500 Hz, 1 kHz, or multiple selectable frequencies |
1 kHz for general field calibration Choose another frequency only when required by the measurement procedure or instrument documentation. |
A 1 kHz reference is widely used for acoustic measurement checks and is commonly supported by sound-level meters and acoustic calibrators. The selected frequency should match the test method whenever a specific frequency is prescribed. | Confirm that the sound-level meter, microphone, and calibrator support the same nominal frequency. Do not substitute a different frequency for a specified test frequency without documented approval. |
| Sound Pressure Level | 94 dB SPL and 114 dB SPL at 1 kHz; other levels may be available |
94 dB for routine checks Use 114 dB when the measurement setup requires a higher level and the microphone system is rated for it. |
At 1 kHz, 94 dB SPL corresponds to 1 Pa RMS, while 114 dB SPL corresponds to 10 Pa RMS. The lower level is generally convenient for routine verification and reduces the risk of overload. | Check the sound-level meter's calibration range, microphone maximum sound-pressure level, calibrator output tolerance, and the test procedure's required reference level. |
| Coupler Diameter | 1/2-inch microphone opening; adapters for 1/4-inch or 1-inch microphones |
Use the coupler that exactly matches the microphone size A dedicated adapter is acceptable only when it is specified for the microphone and calibrator combination. |
The coupler creates the acoustic cavity around the microphone. A poor fit can cause leakage, unstable readings, or an incorrect sound-pressure level. | Verify the microphone diameter, adapter type, insertion depth, gasket condition, and whether the microphone has accessories that prevent full seating. |
| Microphone Configuration | Free-field, pressure-field, or random-incidence measurement microphone |
Follow the microphone manufacturer's calibration configuration Use the correct adaptor for the microphone body and grid arrangement. |
Microphone construction and protective grids can affect the fit and the measured response. The calibrator verifies the complete microphone-and-meter chain only when the microphone is correctly installed. | Remove only accessories that the procedure permits. Never force the microphone into the cavity or operate the calibrator with an incomplete seal. |
| Accuracy Class | Laboratory Standard (LS), Class 1, or Class 2 under IEC 60942 |
Class 1 for precision sound-level measurements Class 2 may be suitable for applications using Class 2 sound-level meters; LS is intended for higher-accuracy laboratory work. |
The calibrator's class defines its permissible performance limits under the applicable standard. The calibrator should normally be at least as accurate as the measurement system or as required by the quality procedure. | Check the latest certificate, operating conditions, applicable IEC 60942 classification, and the accuracy requirements of the measurement standard. |
| Output Stability | Fixed-level output with automatic or manual stabilization |
Choose stable output with a clear ready indication Automatic stabilization is useful for repeatable field checks. |
The reading should be taken after the acoustic output has stabilized. A stable signal helps distinguish instrument error from temporary settling or handling effects. | Allow the specified warm-up or settling time, keep the calibrator and microphone still, and observe whether the level indication remains steady. |
| Environmental Conditions | Temperature, relative humidity, and ambient pressure within the stated operating range |
Use the calibrator within its published environmental limits Avoid rapid temperature changes, condensation, and excessive ambient noise. |
Environmental conditions can influence microphone sensitivity, battery performance, and acoustic output. Extreme conditions may invalidate a field verification. | Record relevant environmental conditions when required, allow equipment to acclimatize, and keep the coupler free from moisture and contamination. |
| Traceability and Verification | Calibration certificate, adjustment record, and pre-/post-measurement verification |
Use a valid, traceable calibration certificate Perform a field check before and after critical measurement sessions when required by the quality system. |
A sound calibrator is a reference source, not a substitute for periodic laboratory calibration. Traceability supports confidence in measurement results and audit records. | Check certificate validity, serial identification, calibration interval, battery condition, physical damage, and whether the observed level is within the allowed tolerance. |
Power deserves equal attention. Battery operation suits remote surveys, but battery life changes in cold rooms. Choose a model with clear low-power warnings and an accessible battery compartment. Rechargeable systems reduce waste, yet charging access may be limited overnight.
Check whether the unit supports the voltage and frequency used at your facility. A spare battery helps. Still, it is not a substitute for maintenance records or a verified reference.
Operating conditions can quietly distort results. Review the specified temperature, humidity, altitude, and storage limits before purchase. A calibrator used near a furnace needs greater thermal tolerance than one used in an office. Dust and vibration also matter around workshops and construction areas. Allow the device to stabilize before calibration. Keep the microphone opening clean and avoid blocking it with sleeves or cases. If readings seem unusual, repeat the test in a controlled location. Convenience can hide uncertainty. Document the conditions beside every calibration record.
A reliable Spl Calibrator should come with a current, traceable calibration certificate. Check the instrument’s serial number, calibration date, reference standard, and measurement uncertainty. The certificate should identify the laboratory and its competence, preferably through ISO/IEC 17025 accreditation. Do not accept a generic compliance sheet. It may describe a product, not your actual unit. I once overlooked a calibration date hidden in a second-page table. That small mistake could have weakened an entire noise survey.
Verification procedures matter just as much. Ask how the calibrator is tested before release and after servicing. A sound level meter should be checked at the stated frequency and sound pressure level, often 1 kHz and 94 dB or 114 dB. Confirm the allowed tolerance, environmental conditions, and reference microphone used. During field work, inspect the adapter seal, listen for unusual instability, and record the reading before and after measurement. A noticeable difference deserves investigation. Sometimes, the equipment is not the only problem; temperature, dust, or poor fitting can affect results.
Keep the certificate with the instrument. Match every serial number. Record pre-use and post-use readings. Ask for the verification method, not just the final result. If the procedure is unclear, pause before trusting the data. I still find paperwork easy to trust too quickly. A practical review is safer than a polished stamp.
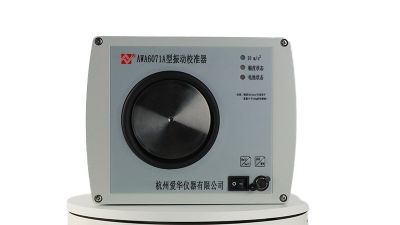
The AWA6071A Dual-Level Vibration Calibrator is designed for precise and repeatable verification of vibration measurement instruments. It complies with GB/T 23716-2009 and JJG 1062-2010, providing a dependable reference for sensor calibration and routine performance checks. Its fixed output frequency is 15.915 Hz with an accuracy of ±1%, helping users maintain stable and traceable calibration results across different testing conditions.
The calibrator offers two selectable RMS acceleration levels, 1 m/s² and 10 m/s², allowing users to match the output to various sensor ranges and calibration requirements. It can also convert acceleration readings directly into velocity in mm/s and displacement in mm, making it practical for instruments that use different vibration parameters. This multi-parameter capability reduces calculation steps and supports more efficient field and laboratory work.
When selecting a vibration calibrator, users should consider required acceleration levels, frequency stability, applicable standards, and the types of instruments to be tested. The AWA6071A is suitable for machine vibration monitoring equipment, hand-transmitted vibration meters, and environmental vibration instruments, making it a versatile option for maintenance departments, inspection services, and calibration laboratories.
Match the calibrator’s accuracy to the meter’s accuracy class. Equal or better performance is safer. “Close enough” can mislead.
Review the meter’s accuracy class, required frequency, sound levels, microphone size, and calibration procedure. Check the calibrator’s uncertainty, too.
Many routine checks use a 1 kHz tone. Your instrument may require another frequency. Always follow its manual.
A 94 dB setting suits many routine checks. A 114 dB setting can help when background noise affects the lower level.
Insert the microphone fully into the coupler. It should sit evenly, without visible gaps. A loose fit can cause major errors.
Match the coupler to the microphone’s diameter and shape. Inspect seals for dust, cracks, or hardening. Small gaps matter.
Record the frequency, sound level, measurement time, temperature, and calibration result. These details can explain later differences.
Calibrate before important measurements and repeat afterward when possible. If readings differ, investigate instead of averaging them away.
Check the battery, temperature limits, calibration certificate, and coupler condition. I once focused too much on displayed accuracy. That was too narrow.
No. Traceability, repeatability, and simple handling also matter. A precise device is not useful if workers cannot use it consistently.
Choosing the right Sound Calibrator begins with clearly defining your measurement purpose, required accuracy, and working environment. Consider whether you need the device for routine field checks, laboratory measurements, equipment maintenance, or compliance testing. Understanding calibrator classes and performance standards will help you select a model with suitable stability and precision. Its accuracy should also be compatible with, or better than, that of your sound level meter to ensure reliable verification results.
Next, confirm the correct calibration frequency, sound pressure level, and coupler size for your meter and microphone. Practical factors such as portability, battery life, power options, temperature range, humidity tolerance, and resistance to regular handling can greatly affect usability. Finally, review the calibration certificate, traceability information, and recommended verification procedures. A well-documented Sound Calibrator, used according to consistent procedures, can support dependable measurements and help identify instrument drift before it affects important testing outcomes.